Monday, May 31, 2010

Summer is in the Bag

Women love purses because they always fit.

 Can a woman have too many purses?


Think of the endless possibilities.


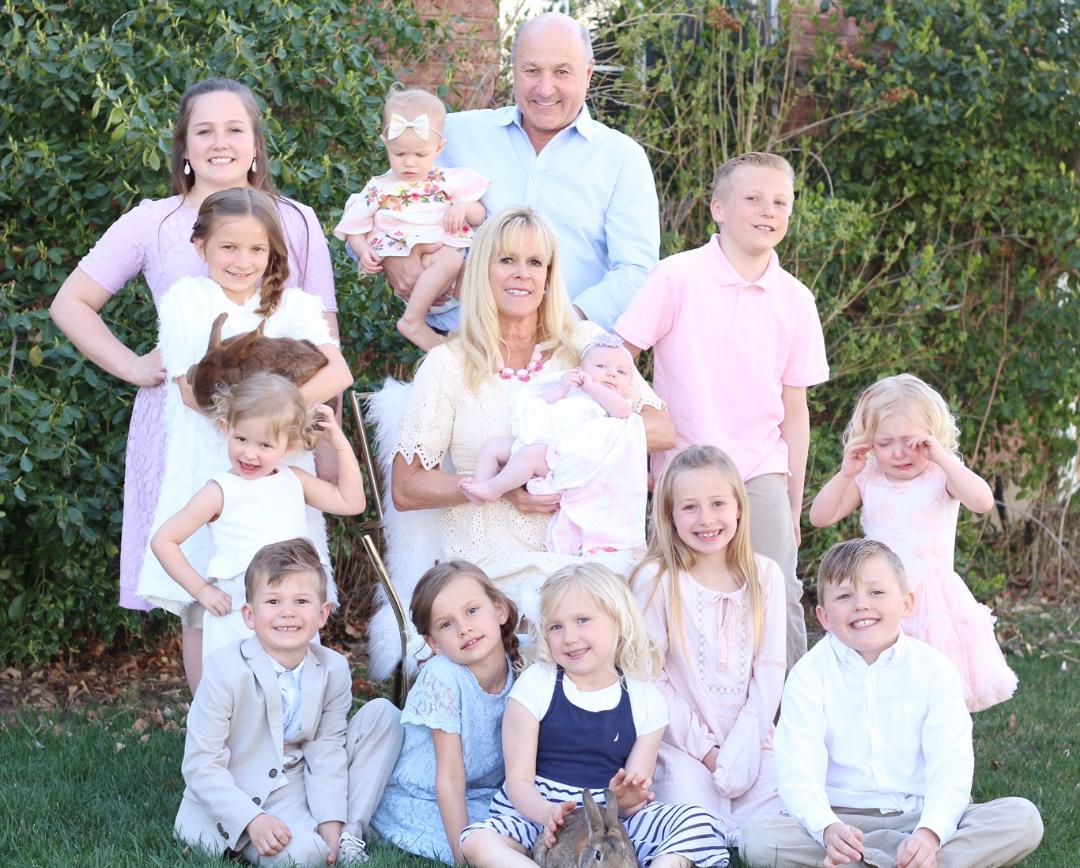
I got this fun idea to create ruffled bags.  Everyone who has seen them wants one.  They want to use them as diaper bags, beach bags, travel bags and purses.  I auctioned two off for a charity auction. Here are the directions.  This little lady toting the all white bag bought this purse at the auction with her own money!


Every age loves a purse.


 Ruffled Bag

1 ready made canvas tote bag - I used one measuring 18x13 inches (The all white bag was a little smaller.)
1/4 yard of 4-5 fabrics or 1 1/4 yard of one fabric

 Start by removing the handles and cutting down the side of a ready made canvas tote bag to open it up.  If your bag has a top zipper remove it just by cutting it off.  The top of the bag will be covered.


Next measure the width of the bag and multiply it by 2.  This will give you the measurement around the entire bag.  Then cut a piece of fabric that is 5 inches by two times the width of your bag. My bag was 18 inches so my first piece of fabric was 5x36 inches.


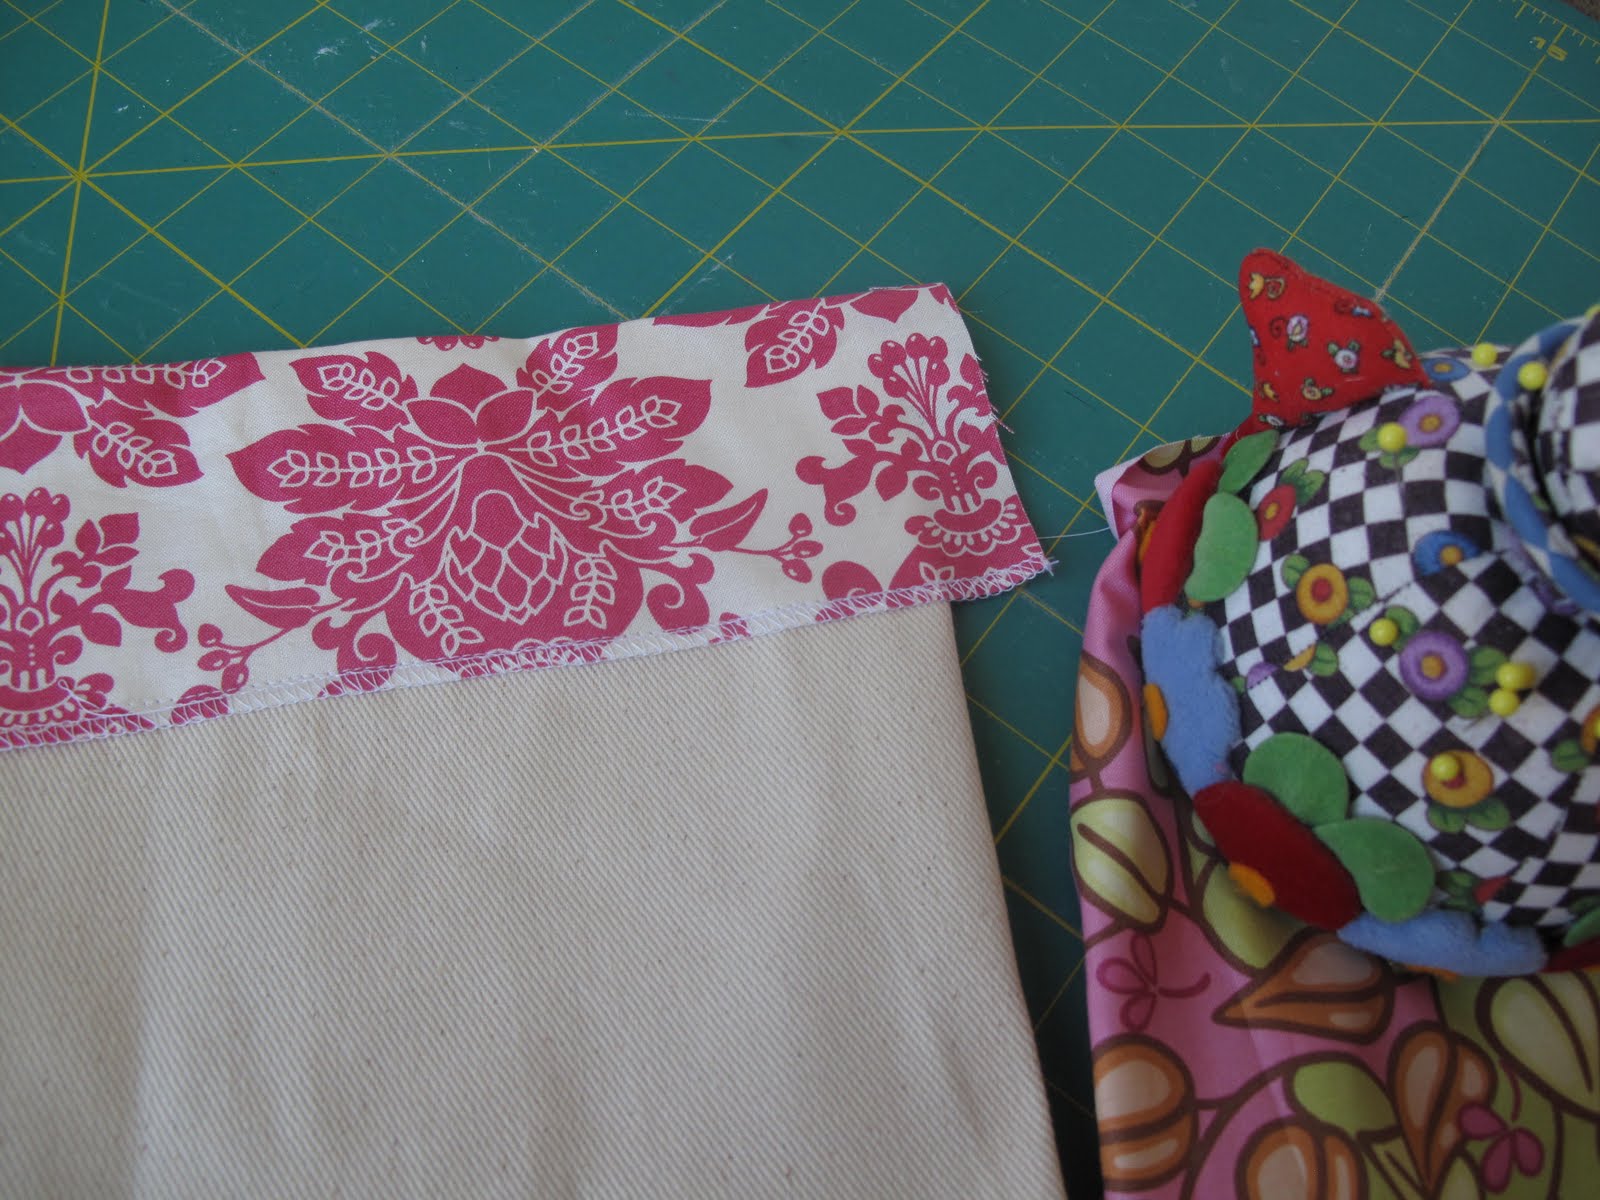
 Serge one long edge of this piece of fabric.  You could make this without a serger by turning the edge under and sewing it in a narrow seam.  Sew this piece with the raw edge 3/4 inch away from the top edge of your bag.


Turn this strip of fabric to the outside of the bag and press.  Sew 1/4 to 3/8 inch away from serged edge all around the bag.  This will make the top strip of your bag.


Next is the fun part!  You will want 3 or 4 ruffles.  Measure from the line of sewing you just did to the bottom of your bag to determine how wide to make your ruffles.  On the 18x13 inch bag, for three ruffles, I made the top one 4 inches and the next two 4 1/2 inches because there will be a little overlap. 

 Cut the fabric into strips that are twice the entire circumference of the bag  by the desired height of the strip - i.e. the 18 inch bag is 36 inches around, so I would cut a strip that is 72 inches x 4 inches.  Serge both edges and run a gathering stitch about 1/2 inch from the top of the strip.  Mark the strip into fourths and mark the bag into fourths also so that your ruffles will be even around the bag.  Pin the ruffle around the bag and sew it on with about a 3/8 inch seam, covering the serged edge of your first strip.


 After you have sewn the top ruffle on, use your straight edge to mark the placement of the next ruffle.  Place the straight edge 1/4 inch under the bottom of the top ruffle, making sure that it is level with the top and bottom of the bag.  


Mark with a pen.  Turn the bag over and mark the back side making sure that the lines meet up at the sides.


Repeat this process with the two remaining ruffles (or more if you decided to do more).  Remove the gathering stitches from each ruffle.

Turn the bag inside out and making sure to line up the ruffles, pin the bag closed.  The bottom ruffle might get caught in the seam, so I stitched the bottom of it, right sides together about 2/3 of the way up the ruffle so it would have a finished edge, then tucked the stitched part into the bag so it wouldn't get caught in the seam. Stitch the bag closed.  Finish the edge with the serger.  

Turn the bag inside out. 

Measure the width and length of the ready made handles that you previously cut off. You will want about 3/4 to 1 inch more than double the width of your handles to make the seam and have enough room to insert the handles into the fabric tube.  My handles were about 1 inch wide so I cut two strips of fabric 3 inches wide by the length of the handle.  With right sides together, sew the strip up and turn it.  Press flat and using a large safety pin or bobby pin pull  the ready made handle through your fabric.  Press and then finish the edges with your serger.  Place them on the inside of the bag where they were originally placed and sew into place making a rectangle shaped design to secure the handles well.


   Add a flower if desired.  I will give directions for these burnt edge roses another time.


My good friend Lila Tueller designed several of the fabrics on the different bags for Moda. The first bag on the post features all of her fabrics.  Click HERE to view her blog and see more of her beautiful designs and patterns.


On the all white bag at the beginning of this post, I used a white canvas bag and didn't add the top strip. I just placed the first ruffle under the edge of the bag, about 1 inch down.  I used a wrinkled white cotton gauze that doesn't fray much, so I did not serge the edges.  

Have fun with your summer bags!

I am posting this with the following:

Skip to My Lou's Made by You Monday.
The Girl Creative's Just Something I Whipped Up Monday.


Saturday, May 29, 2010

Best for Last - Dessert Course from Spring Garden Party

   "If you have more than one friend, you have more than your fair share."  - Unknown

   For the fourth and final course, we wanted an explosion of flavors by creating a dessert sampler platter like we have had in fine restaurants.
DESSERT COURSE

Mango Balls with Raspberry Sauce
Sinfully Chocolate Brownies with Candied Violets
Fresh Strawberries with Hot Fudge Sauce


   We first had this frozen treat at the Grand Wailea Resort on Maui.  It is a family friendly resort that is incredibly beautiful.  Check it out here.  We would order several of these desserts at the poolside restaurant.  Alas, they no longer feature this dessert.  One of our favorite pastimes is to try and recreate food we have had at a restaurant.  This one was simple to create.

Mango Balls from the Grand Wailea Resort

1 pint Haagen-Dazs Mango Sorbet
1 pint Haagen-Dazs Vanilla Ice Cream
2 C. chocolate covered peanuts or almonds, finely chopped

   To make the Mango Balls, you scoop Haagen-Dazs Mango Sorbet (Don't make the mistake we have of getting their Mango Ice Cream, it doesn't have the right tang to compliment the Vanilla Ice Cream.), into balls and Haagen-Dazs Vanilla Ice Cream into balls.  Let them harden in the freezer, then cut them in half and press them together.  Refreeze.  It is important to freeze and then refreeze the balls as they get too soft too work with.


     Remove the balls from the freezer one at a time.  Roll the balls in the finely chopped nuts until they are covered.  We used to always use peanuts, but tried almonds this last time and loved them.  They tend to be a little fresher.  You can buy large quantities of the chocolate covered almonds from Costco, but then you have to eat the rest!  


   To serve, cut the balls in half so that both ice creams show in the half.  Position on the plate slightly offset to show both flavors.  Drizzle with Raspberry Sauce.


Raspberry Sauce

1 - 12 oz. package frozen raspberries, thawed
3/4 C. sugar
1-2 tsp. lemon or lime juice (optional)

   Place raspberries in blender.  Blend until smooth.  Put through a fine mesh sieve to remove seeds.  Stir sugar and juice into raspberry sauce and blend.  Serve.  This will last for quite a while in the fridge.  We always try to keep some on hand.

Sinfully Chocolate Brownies

3 1/2 C. semi-sweet chocolate chips (see why they are sinfully chocolate?)
1 C. butter
1 T. vanilla
3/4 C. flour
1 1/2 T. baking powder
1/2 tsp. salt
3 eggs
1 C. plus 1 T. sugar

   Melt the chocolate chips and butter.  Stir in the vanilla and let cool for 10 minutes.  Meanwhile whisk the flour, baking powder and salt together in another bowl.  In a third bowl whisk the eggs and sugar.  When chocolate has cooled some, blend the egg mixture and chocolate mixture together.  Then fold in the flour.  

   Pour into a foil-lined 9x13 inch pan that has been sprayed with baking spray (i.e. Pam with flour added).  Bake in a 350 degree oven for 30-35 minutes.  Check to see if it is done by inserting a toothpick into the center.  It should come out with just a few crumbs.

   These are the dark, dense, wet type of brownies.  When cool, dust with powdered sugar.  Let cool completely before cutting or they will just fall apart. 

   To serve, cut into squares and then into triangles.  Top with a candied violet if desired.  To find directions on how to make candied edible flowers, click here.


Strawberries with Hot Fudge Sauce

Fresh strawberries, wiped clean with a moist paper towel
3/4 C. semi-sweet chocolate chips
7/8 C. sugar
1/8 tsp salt
1 C. cream 
1 tsp. vanilla ( I like to use Mexican vanilla for its stronger flavor.)

   Melt the chcolate in the microwave for 1 minute.  Stir the chips even if they don't look melted.  Melt again for up to 30 seconds.  Stir until completely melted.  Add thesugar and cream and heat in the microwave 30 seconds at a time until heated through.  Be careful not to scorch it.  Add the vanilla and stir.  This keeps well in the fridge.

   Serve in a container along side the strawberries.  Don't be surprised if people start eating it by the spoonful!


   Just a side note - I received a beautiful thank you note in the mail (people still do that!) from one of our friends.  She wrote, "Here's a reason to invite me (us):  I took 3 pages in my journal to draw pictures and describe all the food so that it goes down in history, never to be forgotten! I loved every bite."  

  When we were deciding on a guest list, the above friend was the first one we thought of.  We knew she would appreciate everything.  Have friends over often!  It truly is a treat.  

Thursday, May 27, 2010

King Crab Cocktail with Dipping Sauces - Third Course in our Spring Garden Party

"Love is blind; friendship closes its eyes." - Proverb on friendship

This is the third course in our Spring Garden Party that got rained out and moved into the house.  I hope you have friends you cook dinner together with.  This group has been getting together for about 20 years now.  If not, get a dinner group started.


   King crab legs have become one of our special traditions.  We always serve it for Christmas Eve and for Mother's Day.  For our party we decided to serve it cold and already out of the shell.  Our friends were so grateful for that.

   I bought both of these cute dishes at TJ Maxx.  The shell plates I found last year and could only find six, but this year they had a few more.  I love shopping there.  I told my husband it is like going on a treasure hunt.  The little crab bowls were this year also.  I only saw them at one TJ Maxx store, but maybe they will have a few more next year.

   Usually we bake the crab at 400 degrees for 20 minutes and serve it hot with sourdough bread and melted butter with lemons and limes.  It was already pre-cooked, so my husband just opened the shells.  We had each of the dishes portioned out into glass ramekins so that when we were ready to go we could just place the crab on crushed ice.  I love the ice they sell at Sonic Drive In, if you have one.  It is the little square shaped ice.  We bought that.  It makes for a nicer presentation.  We had the lemons cut and we stuck a toothpick in them and stood them up in the ice.  We placed a spring leaf of lettuce from the garden on top of the ice, then topped it with the crab.


   The crab bowls came in four colors.  I especially loved the green, but alas, they only had one in the green.

Cocktail Sauce

1 C. ketchup
4-5 tsp. extra hot horseradish
Juice of 1 lemon
20 grinds of freshly ground black pepper

Mix all together.  Adjust seasoning to taste.  Can be served immediately.

Lemon Dijon Mayonnaise

1/2 C. mayonnaise
4-5 tsp. Grey Poupon Mustard
Squeeze of fresh lemon  juice

Mix all together.  Adjust seasoning to taste.  Can be served immediately.

This course was also served with the Crusty Bread.  Each person had their own plate of crab.  We also served melted butter and lemons as a third sauce - the most traditional with King crab legs.

My next post will finish out our dinner party  with four courses.  Invite some friends over.  There is nothing like opening your home to friends.

Let me know about what dinners you have done with friends.  I would love to know.  My next post will finish out the four course dinner.

Wednesday, May 26, 2010

Chopped Caprese Salad - Spring Garden Party Second Course

 "Friends are the most important ingredient in this recipe of life." - Unknown


    Our Spring Garden Party was moved inside due to days and days of rain.  We started with a beautiful a Double Cream Brie Appetizer Board that is very simple to make.  Each couple shared the appetizer.  Next we moved on to a Chopped Caprese Salad that was light and tasty.  It was accompanied by home made Crusty European Bread that I will share the recipe for later.

  SALAD COURSE 

Chopped Caprese Salad
Crusty Bread

Everyone loves bruschetta and caprese salad so I decided to serve a light salad that was a cross between the two for our second course.


Chopped Caprese Salad

4-5 large Roma tomatoes, chopped
1 container marinated mini mozzarella balls
2 T. finely sliced fresh basil
3 T. red wine vinegar
3/8 C. extra virgin olive oil
3/4 tsp. salt
dash black pepper
1 large head romaine lettuce, finely sliced

   Cut the mozzarella balls in half.  Gently toss the tomatoes with the mozzarella balls and the remaining ingredients in a bowl.  Cover the bowl and refrigerate for 30 minutes but no longer than a couple of hours.  In serving container place a small handful of shredded romaine then top with the tomato mixture.  Garnish with fresh herbs.  It is too early for my basil so I garnished with fresh oregano from my garden.
   Serve with crusty bread to soak up the extra dressing.

This recipe was likewise ready to be plated.  We had the romaine lettuce in the glasses and the caprese salad in the bowl marinating in the fridge.  The garnish was already washed and wrapped in a paper towel in the fridge.  All we had to do was scoop some caprese salad on top of the romaine and top with a garnish.  So easy and so refreshing.  A piece of bread on the side completed the salad course.

Watch for my next posting with the recipe for the King Crab Meat Cocktail with Dipping Sauces


Spring Garden Party - Rained Out


  "Life is partly what we make it and partly what it is made by the friends we choose." - Tennessee Williams

 We have the greatest friends.  We have several dinner groups that we get together with often.  We always  try to have dinner in our Italian garden during the summer.  We thought we would get a jump on it and have a springtime dinner.  Pots needed to be planted, weeds pulled, roses trimmed, etc., etc., etc.  Mother Nature decided not to cooperate as it rained all week and did again on the day of the party.  No bother, we just moved it indoors.
   We recently celebrated our wedding anniversary and we were so inspired by the appetizer we had at the Stein Eriksen Lodge that we went right back to our room and sketched out a menu on the hotel stationery.
I mean literally sketched!


   A light springtime menu evolved which made the party a breeze as we had everything prepared and many courses plated so that we could enjoy the evening.  The guests were a little frustrated that they couldn't bring anything so I suggested drinks for one couple, crusty bread for another and I ran out of things for the third couple but she brought her grandmother's china tea cups and made us fresh peppermint tea for after the meal. They are the greatest friends!
   It is time to pull up the Spring flowers so I had to use them one last time to decorate with.


   Everyone wanted to know if they were going to be featured in the post like a dinner party in Sunset Magazine.  Of course, I couldn't disappoint them!


APPETIZER

Double Cream Brie Cheese Board
with
Candied Pistachios
Red and Golden Raspberries
Dried Raspberries
Balsamic Glace
Toasted Baguette


Purchase:
Double Cream Brie (or cheese of your choice)
Red Raspberries
Golden Raspberries (optional if you can find them, but they were beautiful on the plate)
Dried Raspberries (optional, but they had a fun crunch)
French Baguette Toasts (or you can slice and toast your own)
Colavita Balsamic Glace (It is described on the bottle as a "silky smooth reduction of Balsamic Vinegar. This can be found in the vinegar section of your grocery store.)

Candied Pistachios
1/2 C. shelled pistachios
1/4 C. sugar
2 tsp. water

In a medium frying pan heat 1/4 C. sugar and 2 tsp. water.  When mixture begins to bubble, stir in pistachios. Let nuts cook in the melted sugar for a few minutes until sugar begins to turn brown.  Turn out onto a piece of buttered tin foil.  Let cool and break apart.

   For this course, everything was plated and covered with plastic wrap and placed in the refrigerator until serving time.  The Balsamic Glace was added just before serving.  Each couple shared an appetizer.

Watch for future postings on the remainder of the menu.

Friday, May 21, 2010

Purple Chocolate Cupcakes


I had to make some chocolate cupcakes too!  These are the purple Wilton cupcake wrappers that I found at JoAnn Fabrics.  I went into Michaels Craft Store the other day and they had a huge selection of cute cupcake cups.  Check them out.  I stocked up on black and white brocade, pink and purple polka dots, hot pink leopard print and several others.  These Wilton cups say that you can bake the cupcake in it, but I find that the batter makes the cup ugly and greasy.  So once again, I baked them in jumbo sized  white cupcake cups so that they could bake a little taller and then removed the cup after cooling.


Purple Chocolate Cupcakes

I started with Betty Crocker's Triple Chocolate Fudge cake mix.  It is really moist already, but I decided to use a 6 oz. container of vanilla yogurt in place of 1/2 C. of the water.  It made a really nice cake.  Then I filled it with a  Peanut Butter Cream Cheese Frosting.

Filling:
4 oz. cream cheese, room temperature
1/2 C. butter, room temperature
1/4 C. peanut butter
2 C. powdered sugar
1 T. water
Cream all ingredients together in mixer, adding as much water as needed to create a fluffy frosting.

Split the cupcakes in half and spread a little Peanut Butter frosting on top.  Place the top halves back on and gently place in the Wilton cups.

Chocolate Frosting:
1 C. butter, softened
1/2 C. cocoa powder
4 C. powdered sugar
1-3 T. water
Cream everything together in mixer, adding as much water as needed to create a fluffy frosting.

Frost the cupcakes with a chocolate frosting placed in a pastry bag with a large round tip or in a large Ziploc bag with the corner cut off.  Squeeze the frosting in a circle starting at the edge and finishing in the middle.
I topped these with Reece's Peanut Butter Cups cut into quarters and a candied violet (thus the purple chocolate cupcake!)

Printable Recipe


Just a few more flowers I sugared.  To try these, refer to the Lemon Supreme Cupcakes for instructions on how to sugar edible flowers.


Fairies In My Garden

Every garden should have fairies in it.


Inspired by Disneyland's Storybook Garden, I always wanted to make a part of my garden into a fairyland.  This section of my garden was designed to contain those pesky herbs that like to wander with oregano on the left side and mint on the right side.  One day a few years ago I decided to pull out the center and create my fairy garden.


I searched for small houses, starting with the ones I had for my Easter village.  Adding to it each year, it has grown, but this year I hit the jackpot at TJ Maxx.  They had lots of beautiful houses, with little fairies already in residence, flying from chains hung on the outside of the houses.  Other people must have been looking for fairy houses too because they went pretty quickly.  I saw a few left last week.


The small greenery above is thyme. The greenery to the left is the oregano.  It is already going crazy.  I like to make pesto with my fresh oregano in the spring before the basil has grown big enough.  It tastes amazingly similar.
  Of course fairies like cupcakes too, so we had to make fairy sized ones for them. I made them in cups used for chocolates and placed them in the mini muffin tin.


The little kids liked this size better than a big cupcake.  They take just a half spoonful of batter and I baked them at 350 for 10 minutes.  Try some. Your little fairies will love you for it.

I bought Disney's Tinker Bell and Friends that are about 2 inches tall for the kids to play with in the fairy garden.  After watching my little grandson, I decided he needed a garden for boy toys.  I bought him the Toy Story characters that are also about 2 inches tall.  Here is the garden for him.


Today they came out and planted vegetables with me.  My daughter, their mother said, "When does doing work stop being fun?"  Right now they want to work with me whatever I am doing.  So much fun!
I am posting this on Outdoor Wednesdays.

Thursday, May 20, 2010

Purple Pansies and Violets - Lemon Supreme Cupcakes


I started a family cookbook using photos when I first got a digital camera, how many years ago?  At first it was only for family but then my husband wanted to share it with friends.  It started out as the family Top Ten Recipes, but soon grew, especially the dessert category.  My husband kept saying I should do a blog to update recipes.  I finally have spent all I want to spend on copies for cookbook updates for all my dear friends and family and they will have to endure my blog to get the newest recipes.  I will also include ones I already put in the cookbook.  Maybe that will inspire them to pull the book out and try something new.  My sister Joni started a food blog - Red Couch Recipes.  It is so inspiring.  She always said she had no creativity!
Check out her blog.  She got into blogging recipes because her daughter wanted a blog.  Check her blog out too - Polka Dot Pantry Sweets.


I planted violets just so that I could do candied violets.  Have you checked out the price for ready made ones?  Every year I seem to miss them as the violets are on for just a short time.  This year I not only candied them, but did it several times and taught one of the young women in my neighborhood.  She went home and taught her sisters and they made these Lemon Supreme Cupcakes for their mother for Mother's Day.


I am a fan of lemon and when I saw a recipe for homemade lemon cake using lemon yogurt, I thought maybe it would be moist enough.  The recipe came from a recent Woman's Day Magazine.  I modified it.  I am a
frosting lover, and I usually eat just the top half of a cupcake.  Inspired by these beautiful cupcake wrappers made by Wilton which I found at JoAnn Fabrics, I made the cupcakes, removed them from their original
cupcake cups, split them in half and filled them with Lemon Curd, put them back together,
gently placing them in the Wilton Cups then frosted them with my own recipe for Lemon Curd Frosting and
finished it off with the most beautiful sugared spring flowers.


Sugared Flowers

Just Whites (powdered egg whites, found in your baking section)
Granulated sugar
Fresh edible flowers that have no pesticides

Reconstitute egg whites according to package directions.  You will probably want the equivalent of just one  or two egg whites.  The egg whites are really sticky and take a minute to dissolve in the water.  Be patient with it and get all of the lumps out.  Gently wash the flowers.  Dip the clean flowers one at a time into the egg whites.  Blot excess off on a clean paper towel.  Holding the flower by the stem end, gently spoon granulated sugar on the front of the flower and then on the back.  Lay on parchment paper to dry overnight.  If there is too much egg white and the sugar seems too thick, just rinse the sugar off and start over.

Lemon Supreme Cake

1 lemon
3 C. flour
2 tsp. baking powder
1/2 tsp salt
1 C. milk
1- 6 oz. container lemon yogurt
1 tsp vanilla
1 C. butter, softened
1 3/4 C. sugar (Baker's sugar is a finer grain and gives you a finer grain in your finished cake, but it is opt.)
3 large eggs

   Heat oven to 350 degrees.
   Zest the lemon, you should have about 1 tablespoon.
   In a medium bowl, mix the flour, baking powder and salt
   In a small bowl whisk the milk, yogurt and vanilla.
   In mixer bowl, beat butter and sugar together on medium speed until light and fluffy.  Beat in eggs, one at a time, scraping the bowl after each addition and beating well after each addition.
   On low, beat flour mixture into butter mixture in three additions, alternating with the milk mixture.  Beat well and scrape bowl after each addition.  Fold in the zest.
   Spoon into prepared pans - use 2 - 8 inch pans or 18-20 muffins.  I used jumbo muffin cups in regular muffin pans and filled about half full.  This gave me a taller muffin.  I later discarded that muffin cup.
   Bake 25-30 minutes for the 8 inch pans and 20-25 minutes for the cupcakes, or until toothpick inserted in the center comes out clean. Let cool for 10 minutes and then remove from pan.
   When doing a round cake, cut parchment paper to fit the bottom and don't grease the sides of the pan.  When the cake has cooled for 10 minutes, run a sharp knife around the edge of the cake.  Your cake comes out perfectly this way, and doesn't dome up in the center.

Lemon Curd Frosting

1/2 C. butter, softened
1 -10 oz jar Lemon Curd ( I like Dickinson's which you can find in many grocery stores in the jam section.  If you have a Trader Joe's, theirs is wonderful.  Don't use any that are bright yellow.  They can be bitter)
4 C. powdered sugar
1-3 T. water
Cream all together, adding water as needed until soft and creamy.

Assembly

Remove cupcakes from cups, split and spread with a little lemon curd.  Put halves back together.  Place in Wilton Cupcake Wrappers.  I found these at JoAnn's Fabric or you can find them on line.  Etsy.com has a great selection.  I also tried making my own with a 6 1/2 x 6 1/2 inch piece of paper which I pleated over a narrow glass that I had turned over.
Place frosting in a frosting cone with a large plain tip or in a Ziploc plastic bag with the corner cut off.  Frost in a circular motion from the outside to the center.
   For the cake, fill between layers with lemon curd.  Frost top and sides and finish with crushed Lemonheads if desired.

   I brought these to a shower and then to a charity auction and they were huge hits.

   Well, that's all for my first blog ever.  My friends can't believe I am finally a blogger!

Follow me on Instagram